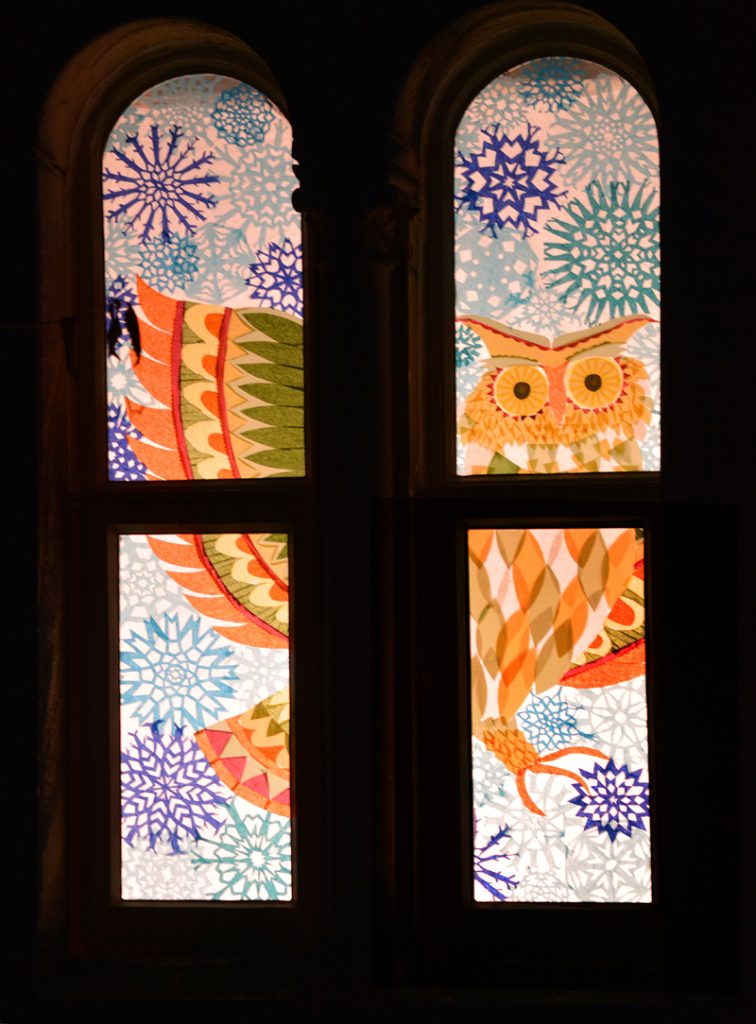
We use tissue paper for our advent windows. The first time we did one we used glass paint, but couldn’t get the depth of colour we wanted so it’s been tissue paper all the way ever since. We like the way that you can layer up the colours and you never quite know what the finished effect is going to look like. We have clear acetate which you can buy in big sheets then cut to the size and shape of your window. We map out the shape of the windows (including gaps in the design where the stone sections would be) then draw out the design onto the newspaper and lay the acetate on top of it. We use a Sharpie to trace over any outlines then cut out the tissue paper into the shapes we want and stick it onto the acetate with PVA glue. If you did want to add any detail you can turn the acetate over and draw onto it once you’ve finished all the sticking. It usually takes about 4 nights to do. And you can pick/clean off the tissue paper/pen to reuse the acetate so you don’t need to buy new each year.
The acetate fits snugly into the shape of the windows and we use drawing pins stuck into the edge of the window frame at an angle to hold it in place. Then we pin a white sheet behind the whole window (with the curtains moved out of the way!) to give the colours some oomph when the light shines through. We use a work lamp on a stand and have it plugged into a timer so that the light goes on at 4pm and off at 10pm.
This all makes it sound quite arduous but it’s really not! We love doing our advent window each year!